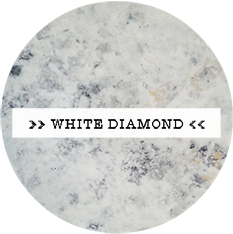
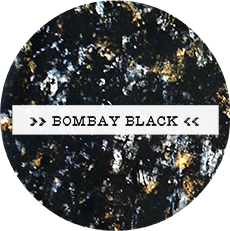
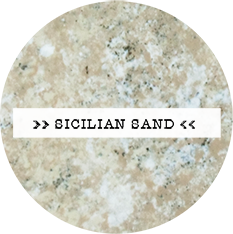
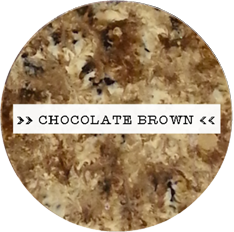
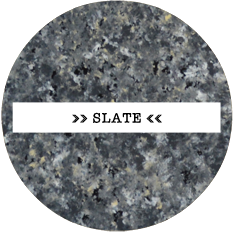
Five Giani Countertop Colors
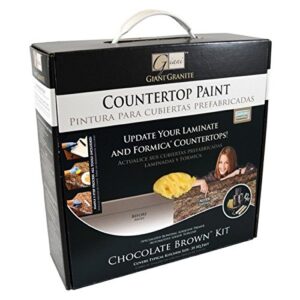
Order any of the Giani Countertop Colors here
Giani Countertop Colors – heat resistant up to 250 degrees fahrenheit.


Question:
Is it possible to vary the Giani Countertop Colors using this kit (and the kit only)? For instance, if I want it to look more uniformly black or have more coppery tones in it?
Answer:
Yes, you can customize it however you want. All the Giani Countertop Colors, black, silver, copper, and shimmery black are in separate containers and you can paint your counter top to your liking.
Question:
I am trying to match a black granite island i already have. it does not have any other color flecks in it. could i do a solid black w/ topcoat?
Answer:
you can absolutely use the Primer and Topcoat together to create a solid black look. Please keep in mind that solid color applications tend to show imperfections more easily than the sponged granite technique.
Question:
Can I use some kind of wax polish on finished project to protect it better
Answer:
Unfortunately, using a wax polish or any additional coating would void your warranty. This is because we cannot predict how your Giani Countertop Colors will react with the polish. Your Giani Granite Topcoat should provide sufficient durability for your counters. We recommend cleaning with only antibacterial soap and water or our Giani Granite Cleaner
Question:
Can you clean it with soap and water
Answer:
Yes! I have had it for almost 6 months now and I still love it and you can clean it with just soap and water
Question:
Has anyone used this on beveled edge counter tops ?
Answer:
Cloudiness in a clear Polyurethane is typically indicative that a little `dry rolling’ – or – a heavier application may have occurred –
`Dry rolling’ usually happens when the coating is `over-rolled’ a little – or applied very thinly. This causes the nap in the roller to slightly pull up the coating during its application – Which creates a slight texture – and makes the finish appear dull because of the way the light refracts off the myriad of angles –
In addition – if a clear polyurethane is applied too heavily – then it may also become cloudy because of polyurethane’s inherent slight opaqueness –
Fortunately – the remedy for either occurrence is the same – and it’s easy to perform . . .
1) First, you’ll need to smooth out and erase the dull cloudy areas and the lap lines. You may accomplish this by using a very fine grit #600 sand paper as you did before. You don’t have to remove all of your existing topcoat – just remove enough until they’re smooth or the cloudiness is erased –
Note – it’s OK if you get down into your Minerals during this process – because many people will lightly sand their Minerals before applying their first Topcoat. You’ll know that you’ve reached your Minerals when your sanding dust turns from a light to a dark color –
You’ll also notice after sanding – that your existing Topcoat will appear scuffed up – and that’s OK because the next new Topcoat will bring back its clarity and the scuffs will disappear –
And finally – you’ll also be able to tell when the cloudiness is erased by swiping the area with a damp cloth and observing the Topcoat’s clarity while it’s still wet – Because this will represent what your finish will look like when the new Topcoat is applied –
2) After you’ve taken care of the problem areas – lightly rough-up or `de-gloss’ the remainder of your entire countertop with the same #600 sandpaper because this will help the new Topcoat adhere – and it will minimize the potential of creating any cloudiness in those areas as well.
Note – most people leave their backsplashes alone – untouched – because they typically don’t need to be re-Topcoated –
3) After you’ve completed de-glossing the remainder of your tops – wipe up the sanding dust with a damp cloth and let it dry. Once it’s dry – you’re ready to apply the new Topcoat –
And here are some additional tips to ensure the smoothest final finish . . .
· Turn off any ceiling fans during the application to ensure the Topcoat flows out properly –
· Close any window shades that are permitting direct sun rays onto the countertop –
· Bring in a small lamp – or light – into your kitchen – and move it around so you can see your Topcoat coverage progress – because it may be hard to see what you’ve already Top coated – Note – don’t direct, high wattage spot lights onto your tops because their high temperature may prevent the fresh coat from flowing out properly –
· Work in sections that are within your arm’s reach –
· The first thing to coat in each section is a narrow strip along the top and bottom of your backsplash with the foam brush. Note – when you get to the section with your sink or stove – coat a narrow strip around that first as well –
· Next, if you can reach the section’s backsplash without bumping up against the front edge of the counter, then roll on a thin coat to the front edge first – and then reach over it – and cover your top – And finally finish the section by lightly covering your backsplash – without re-wetting your roller –
· If you can’t reach the backsplash without touching the front edge – then do just the opposite – and roll on a very thin coat to the backsplash first, and then cover your countertop – and finally finish up with the front edge –
· Work efficiently because it will allow each section to blend together while they’re still wet – Here’s the optimal rolling pattern – you don’t have to follow it – it’s just a guide . . .
Note – don’t go back and re-roll an area that may have a lap line – because the line should disappear as it dries down over the next four hours – In addition, re-touching the Topcoat as it’s drying will imprint the same texture predicament – The same is true for any spot that you may have missed. Let it dry – and it should disappear as it dries —
Another new resource to assist you in your new Topcoat is a new demonstration video that we just created called “Topcoating Tips – The video is located on your Demo DVD – or below the monitor on Giani’s “Learn How” Page at http://www.gianigranite.com/learnhow.html – and illustrates the Topcoating process in more detail on a island or peninsula . . .
Once you follow the above steps – your Giani Topcoat will look great